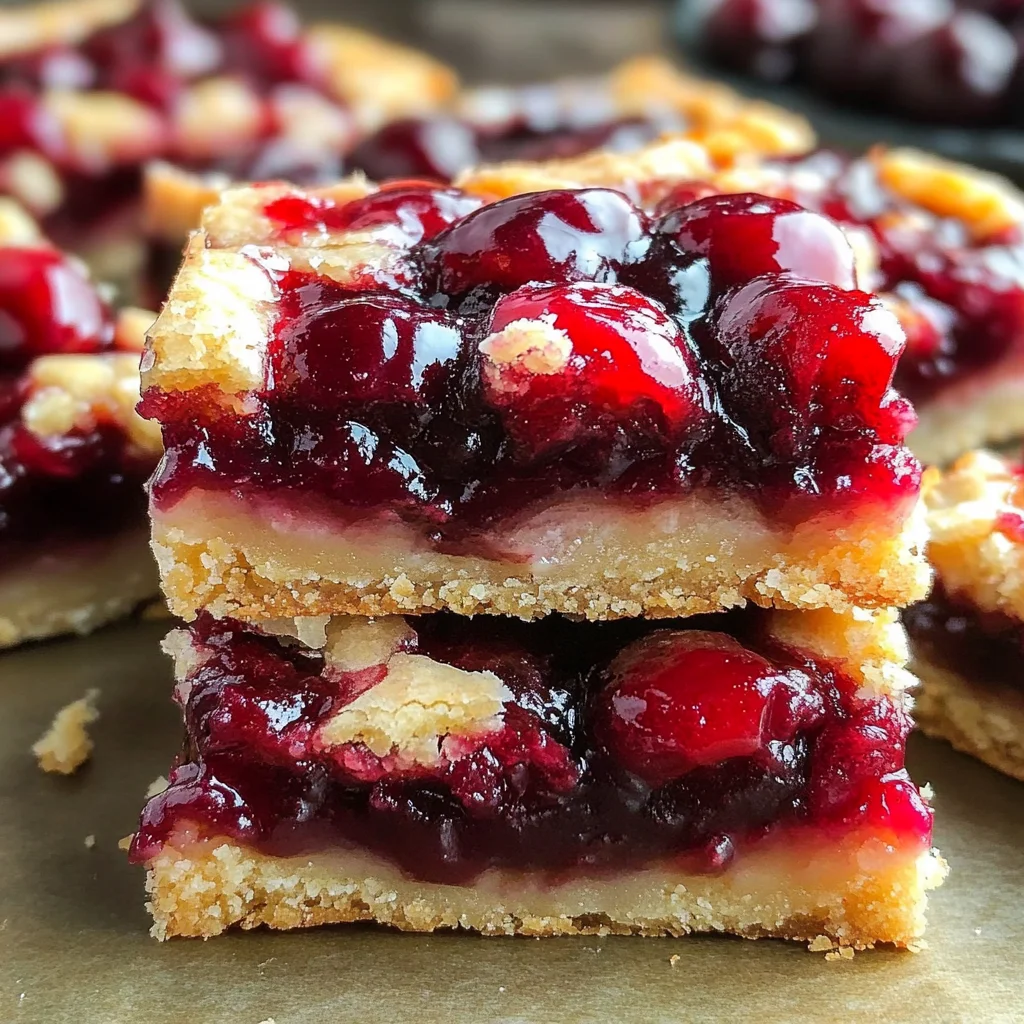
special occasion Cherry Bars are a delightful holiday dessert that combines a buttery base with sweet and tangy cherry pie filling. These bars are not only simple to make but also perfect for any festive occasion, from special occasion parties to family gatherings. With their rich flavors and beautiful presentation, they are sure to impress your guests and become a staple in your holiday baking collection.

Jump to:
- Why You’ll Love This Recipe
- Tools and Preparation
- Essential Tools and Equipment
- Importance of Each Tool
- Ingredients
- For the Base
- For the Topping
- How to Make special occasion Cherry Bars
- Step 1: Preheat the Oven
- Step 2: Make the Batter
- Step 3: Combine Dry Ingredients
- Step 4: Assemble the Layers
- Step 5: Baking
- Step 6: Cooling
- Step 7: Adding the Glaze (Optional)
- Step 8: Finish and Serve
- How to Serve special occasion Cherry Bars
- With Whipped Cream
- With Vanilla Ice Cream
- With Coffee or Tea
- As a Dessert Platter
- With Nuts or Sprinkles
- As Gifts
- How to Perfect special occasion Cherry Bars
- Best Side Dishes for special occasion Cherry Bars
- Common Mistakes to Avoid
- Storage & Reheating Instructions
- Refrigerator Storage
- Freezing special occasion Cherry Bars
- Reheating special occasion Cherry Bars
- Frequently Asked Questions
- How do I ensure my special occasion Cherry Bars are moist?
- Can I use fresh cherries instead of pie filling?
- What is the best way to cut my special occasion Cherry Bars?
- Can I customize the topping on my special occasion Cherry Bars?
- Final Thoughts
- 📖 Recipe Card
Why You’ll Love This Recipe
- Quick and Easy: This recipe can be prepared in just under an hour, making it perfect for busy holiday schedules.
- Deliciously Festive: The combination of buttery crust and cherry filling creates a flavor profile that captures the essence of the season.
- Versatile Serving Options: These bars can be served warm or chilled, with or without glaze, catering to different preferences.
- Crowd-Pleaser: With 24 servings, these bars are ideal for sharing at parties or family gatherings.
- Make-Ahead Friendly: Prepare them in advance and store for a few days without losing flavor.
Tools and Preparation
Having the right tools will make your baking experience smooth and enjoyable. Here’s what you’ll need to whip up these special occasion Cherry Bars effortlessly.
Essential Tools and Equipment
- Mixing bowls
- Electric mixer
- Measuring cups
- 9×13 inch baking pan
- Wire rack
Importance of Each Tool
- Electric mixer: Saves time and ensures that your butter and sugar are creamed perfectly for a light texture.
- 9×13 inch baking pan: Provides ample space for baking the bars evenly.
- Wire rack: Allows the bars to cool properly, preventing sogginess.
Ingredients
special occasion Cherry Bars are made with simple ingredients that come together to create a delightful treat.
For the Base
- 1 cup butter (softened) (Provides the rich, buttery base for the bars.)
- 2 cups sugar (Adds sweetness and helps create a tender texture.)
- 4 eggs (Adds richness and structure to the batter.)
- 1 tsp vanilla extract (Enhances the flavor of the bars with a warm, aromatic note.)
- 3 cups all-purpose flour (The main dry ingredient that forms the structure of the bars.)
- 1 tsp salt (Balances the sweetness and enhances the overall flavor.)
For the Topping
- 1 can – 21 ounces cherry pie filling (Provides the sweet and tangy topping that makes these bars festive.)
How to Make special occasion Cherry Bars
Step 1: Preheat the Oven
Preheat your oven to 350°F (175°C). Lightly grease a 9×13 inch baking pan to prevent sticking.
Step 2: Make the Batter
In a large mixing bowl:
1. Cream together softened butter and sugar until light and fluffy.
2. Beat in eggs one at a time until well incorporated.
3. Blend in vanilla extract for added flavor.
Step 3: Combine Dry Ingredients
In another bowl:
1. Mix together flour and salt.
2. Gradually add this mixture to the creamed mixture until fully combined.
Step 4: Assemble the Layers
- Spread about three cups of batter evenly into the bottom of your prepared pan.
- Gently spread cherry pie filling over this layer.
- Drop small clumps of remaining batter over the cherry filling.
Step 5: Baking
Bake in your preheated oven for 35–40 minutes or until golden brown on top. A toothpick inserted should come out clean.
Step 6: Cooling
Allow your bars to cool completely on a wire rack before adding any glaze.
Step 7: Adding the Glaze (Optional)
Whisk together powdered sugar, milk, and vanilla extract until smooth. Drizzle this glaze over cooled bars for extra sweetness.
Step 8: Finish and Serve
Once the glaze has set, cut into squares. Serve these delicious special occasion Cherry Bars at your next gathering or enjoy them as a festive treat at home!
How to Serve special occasion Cherry Bars
Serving special occasion Cherry Bars can elevate your holiday gatherings. These bars are delicious on their own, but pairing them with complementary items can enhance their flavor and presentation.
With Whipped Cream
- Add a dollop of fresh whipped cream on top for a light and airy contrast to the cherry filling.
With Vanilla Ice Cream
- Serve warm special occasion Cherry Bars with a scoop of vanilla ice cream. The creaminess balances the tartness of the cherries beautifully.
With Coffee or Tea
- Enjoy these bars alongside a steaming cup of coffee or tea, which can highlight the rich flavors of the cherry and buttery base.
As a Dessert Platter
- Include special occasion Cherry Bars on a dessert platter with other festive treats such as cookies and fudge for a colorful display.
With Nuts or Sprinkles
- Top each bar with chopped nuts or festive sprinkles to add texture and visual appeal, making them even more inviting.
As Gifts
- Cut into squares and package them in decorative boxes as homemade gifts for friends and family during the holidays.
How to Perfect special occasion Cherry Bars
To ensure your special occasion Cherry Bars turn out perfectly every time, consider these helpful tips.
- Use Room Temperature Ingredients: Starting with room temperature butter and eggs helps create a smoother batter that incorporates air better.
- Don’t Overmix the Batter: Mix just until combined to keep the bars tender. Overmixing can lead to dense bars.
- Check Oven Temperature: Use an oven thermometer to ensure accurate baking temperatures for even cooking.
- Cool Before Cutting: Allow the bars to cool completely before cutting to help maintain their shape and make cleaner slices.
Best Side Dishes for special occasion Cherry Bars
Pairing side dishes with your special occasion Cherry Bars can enhance your dessert experience. Here are some great options.
- Cheese Platter: A selection of cheeses adds savory notes that contrast nicely with sweet cherry bars.
- Fruit Salad: Fresh fruit provides a refreshing balance and adds color to your dessert table.
- Chocolate Fondue: Dip pieces of special occasion Cherry Bars into melted chocolate for an indulgent treat.
- Pecan Pie: This classic dessert complements the cherry flavor while providing a different texture.
- Cranberry Sauce: The tartness of cranberry sauce offers a unique pairing that enhances the sweetness of the bars.
- Mixed Nuts: A bowl of mixed nuts adds crunch and makes for an easy snack option alongside dessert.
- Hot Cocoa: Rich hot cocoa is perfect for warming up after enjoying these festive treats.
- Spiced Cider: Serve warm spiced cider as a cozy beverage option that pairs well with holiday desserts.
Common Mistakes to Avoid
Making special occasion Cherry Bars can be easy, but avoiding common mistakes is crucial for the best results.
- Bold Ingredients: Forgetting to measure ingredients accurately can lead to a dense or dry texture. Always use proper measuring cups and spoons.
- Bold Overmixing Batter: Mixing the batter too much can make the bars tough. Mix just until combined for a tender texture.
- Bold Skipping Cooling Time: Cutting the bars too soon can cause them to crumble. Allow them to cool fully before slicing.
- Bold Ignoring Oven Temperature: Baking at the wrong temperature can affect doneness. Always preheat your oven and use an oven thermometer if needed.
- Bold Not Using Parchment Paper: Not lining the pan can make it hard to remove the bars. Use parchment paper for easy removal and cleanup.
Storage & Reheating Instructions
Refrigerator Storage
- Store in an airtight container.
- The bars will last up to 5 days in the fridge.
Freezing special occasion Cherry Bars
- Wrap individual bars in plastic wrap and then place them in a freezer-safe container.
- They can be frozen for up to 3 months.
Reheating special occasion Cherry Bars
- Oven: Preheat to 350°F (175°C) and warm bars for about 10 minutes until heated through.
- Microwave: Heat one bar at a time on medium power for about 15-20 seconds.
- Stovetop: Place a bar in a skillet over low heat with a lid for about 2-3 minutes until warmed.
Frequently Asked Questions
Here are some common questions about making special occasion Cherry Bars.
How do I ensure my special occasion Cherry Bars are moist?
To keep your special occasion Cherry Bars moist, avoid overbaking them and ensure you use fresh ingredients, especially eggs and butter.
Can I use fresh cherries instead of pie filling?
Yes, you can use fresh cherries. Just pit and slice them, adding sugar and cornstarch to thicken if needed.
What is the best way to cut my special occasion Cherry Bars?
Using a sharp knife dipped in hot water will help create clean cuts without tearing the bars apart.
Can I customize the topping on my special occasion Cherry Bars?
Absolutely! You can try different fruit fillings like blueberry or peach or even add nuts for extra texture.
Final Thoughts
special occasion Cherry Bars are not only delightful but also versatile. You can easily customize them with different toppings or fillings based on your preferences. Give this recipe a try, and enjoy these sweet treats at your next holiday gathering!
Did You Enjoy Making This Recipe? Please rate this recipe with ⭐⭐⭐⭐⭐ or leave a comment.
📖 Recipe Card
Print
special occasion Cherry Bars
- Total Time: 0 hours
- Yield: Approximately 24 servings 1x
Description
special occasion Cherry Bars are the perfect festive dessert, blending a buttery, tender base with sweet and tangy cherry pie filling. Quick to prepare, these bars are ideal for holiday gatherings, pleasing family and friends alike. With just a few simple ingredients and easy steps, you can create a delightful treat that captures the essence of the season. Whether enjoyed warm or chilled, with or without glaze, special occasion Cherry Bars are sure to become a cherished addition to your holiday baking repertoire.
Ingredients
- 1 cup butter (softened)
- 2 cups sugar
- 4 eggs
- 1 tsp vanilla extract
- 3 cups all-purpose flour
- 1 tsp salt
- 1 can (21 ounces) cherry pie filling
Instructions
- Preheat oven to 350°F (175°C) and grease a 9×13 inch baking pan.
- In a large bowl, cream together softened butter and sugar until light and fluffy. Beat in eggs one at a time, then blend in vanilla extract.
- In another bowl, mix flour and salt; gradually add to the creamed mixture until fully combined.
- Spread about three cups of batter evenly in the prepared pan. Top with cherry pie filling and drop remaining batter in clumps over the cherries.
- Bake for 35–40 minutes until golden brown; check doneness with a toothpick.
- Cool completely on a wire rack before adding optional glaze made from whisking powdered sugar, milk, and vanilla extract.
- Prep Time: 15 minutes
- Cook Time: 35–40 minutes
- Category: Dessert
- Method: Baking
- Cuisine: American
Nutrition
- Serving Size: 1 bar (60g)
- Calories: 250
- Sugar: 18g
- Sodium: 150mg
- Fat: 10g
- Saturated Fat: 6g
- Unsaturated Fat: 4g
- Trans Fat: 0g
- Carbohydrates: 38g
- Fiber: 1g
- Protein: 3g
- Cholesterol: 50mg