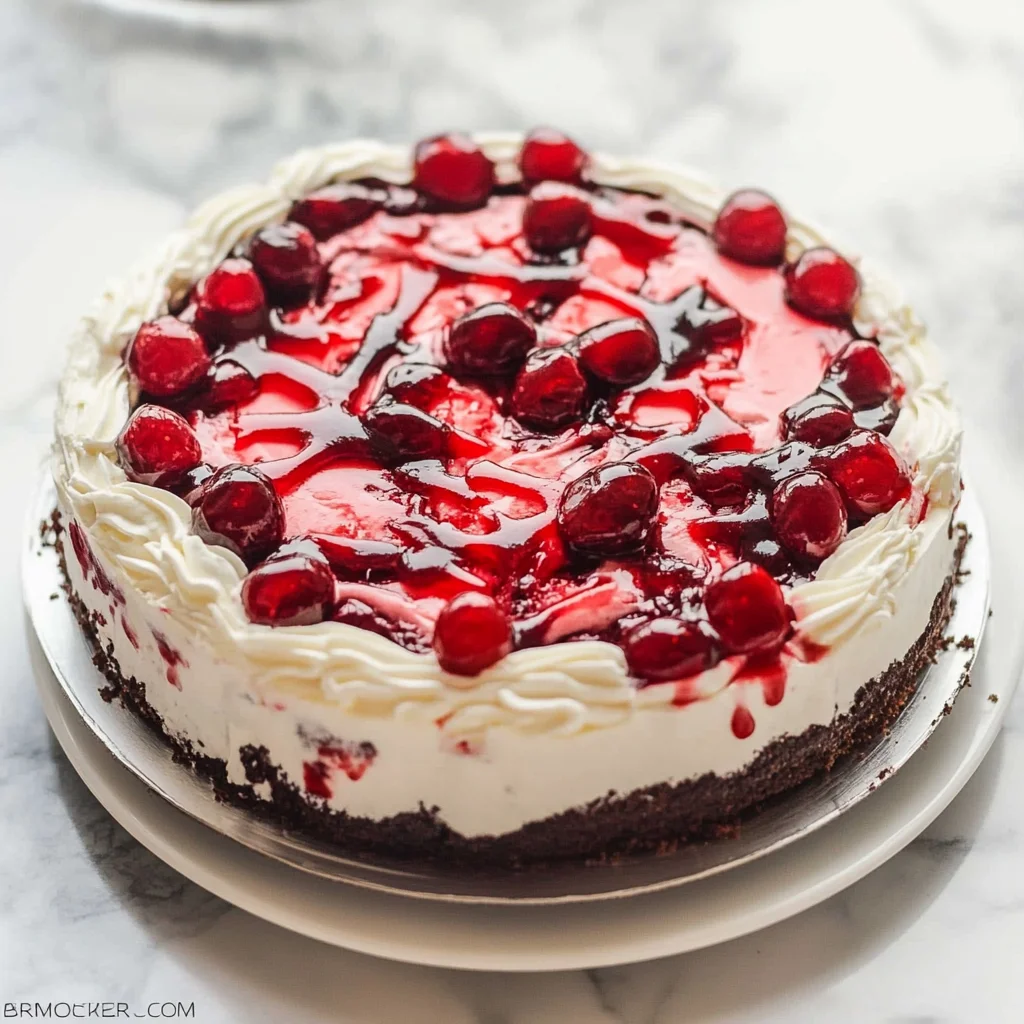
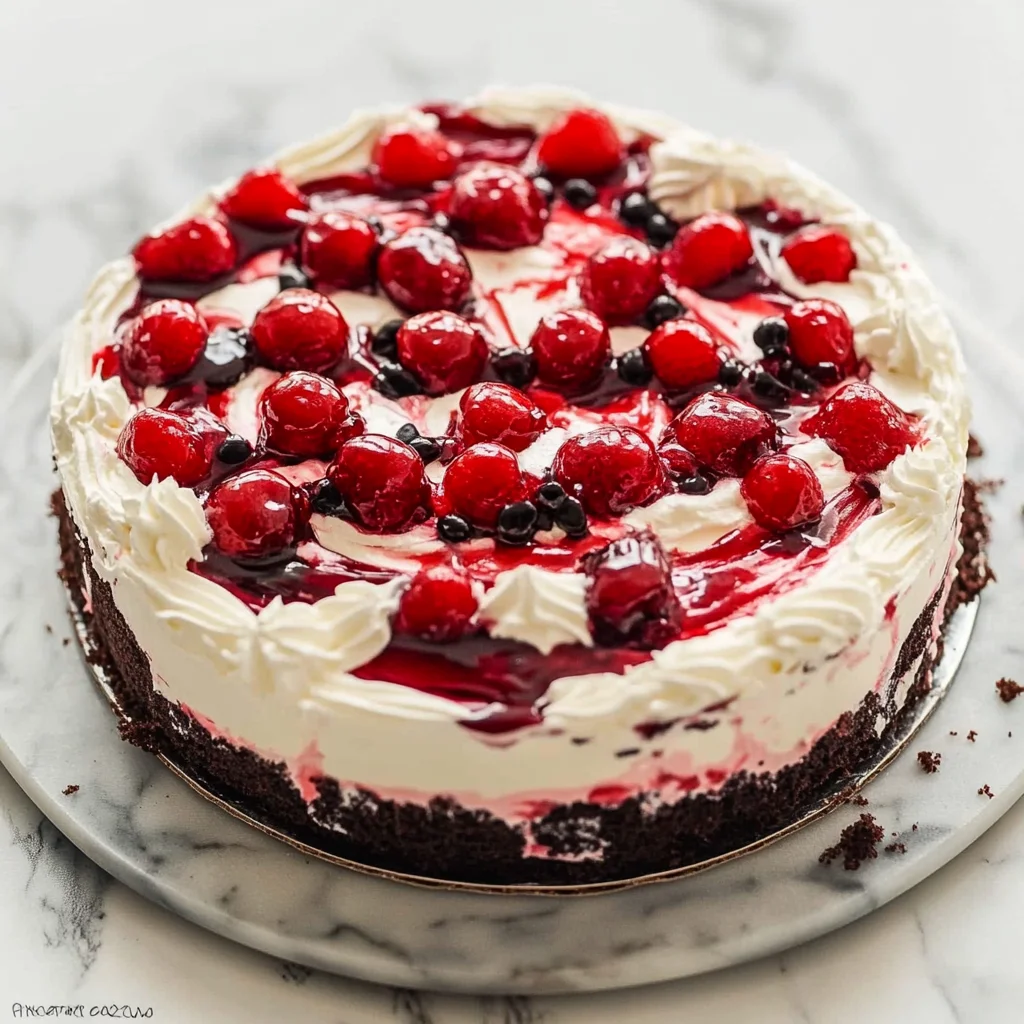
This No Bake Black Forest Icebox Cake is the ultimate easy dessert for summer! With just four simple ingredients, you can whip up a delicious treat that’s perfect for any occasion. Whether you’re hosting a barbecue, celebrating a birthday, or simply craving something sweet, this cake delivers rich chocolate flavors and fruity cherry goodness without the hassle of baking.
Jump to:
- Why You’ll Love This Recipe
- Tools and Preparation
- Essential Tools and Equipment
- Importance of Each Tool
- Ingredients
- For the Cake Layers
- For the Whipped Cream
- For Garnish
- How to Make No Bake Black Forest Icebox Cake
- Step 1: Prepare the Whipped Cream
- Step 2: Layer the Cookies
- Step 3: Add Cream and Cherry Filling
- Step 4: Repeat Layers
- Step 5: Chill Before Serving
- How to Serve No Bake Black Forest Icebox Cake
- With Fresh Berries
- Whipped Cream Garnish
- Chocolate Shavings
- Ice Cream Pairing
- Mint Leaves
- Drizzle of Chocolate Sauce
- How to Perfect No Bake Black Forest Icebox Cake
- Best Side Dishes for No Bake Black Forest Icebox Cake
- Common Mistakes to Avoid
- Storage & Reheating Instructions
- Refrigerator Storage
- Freezing No Bake Black Forest Icebox Cake
- Reheating No Bake Black Forest Icebox Cake
- Frequently Asked Questions
- Can I customize my No Bake Black Forest Icebox Cake?
- How long does it take to prepare No Bake Black Forest Icebox Cake?
- Can I use homemade whipped cream?
- What other desserts are similar to No Bake Black Forest Icebox Cake?
- Final Thoughts
- 📖 Recipe Card
Why You’ll Love This Recipe
- Quick and Easy: This recipe requires minimal effort, taking only 15 minutes to prepare.
- No Baking Required: Perfect for hot days when you want to avoid turning on the oven.
- Deliciously Versatile: Customize with different toppings or use various flavors of pie filling.
- Make Ahead Option: Refrigerate overnight for an even more flavorful dessert ready when you are.
- Crowd-Pleaser: With its rich chocolate and cherry combination, it’s sure to impress family and friends.
Tools and Preparation
To make your No Bake Black Forest Icebox Cake efficiently, having the right tools is essential. Here’s what you need to get started:
Essential Tools and Equipment
- Springform pan
- Large mixing bowl
- Electric mixer
- Spatula
Importance of Each Tool
- Springform pan: Allows easy removal of the cake without damaging its layers.
- Electric mixer: Ensures whipping cream reaches stiff peaks quickly and effortlessly.
- Spatula: Aids in layering ingredients smoothly for an appealing presentation.
Ingredients
This No Bake Black Forest Icebox Cake is an easy no bake dessert that is perfect for summer! Just FOUR ingredients + video!
For the Cake Layers
- 2 packages chocolate wafer cookies or chocolate graham crackers (about 300g)
- 1 can cherry pie filling (540ml or 2 cups)
For the Whipped Cream
- 2 cups heavy whipped cream (or substitute frozen whipped topping, thawed, and omit sugar)
- 1/2 cup powdered icing sugar
For Garnish
- 2 tablespoons fresh parsley, finely chopped
How to Make No Bake Black Forest Icebox Cake
Step 1: Prepare the Whipped Cream
In a large bowl, beat together the heavy whipped cream and powdered sugar on high speed until stiff peaks form. If you need it to hold longer, consider stabilizing it as mentioned in my notes.
Step 2: Layer the Cookies
Place one layer of chocolate wafer cookies in a 9 springform pan. You can break them if necessary to fit or overlap them slightly.
Step 3: Add Cream and Cherry Filling
Top the cookie layer with about 1/3 of the whipped cream and then add 1/3 of the cherry pie filling.
Step 4: Repeat Layers
Repeat this process two more times until you have three layers total.
Step 5: Chill Before Serving
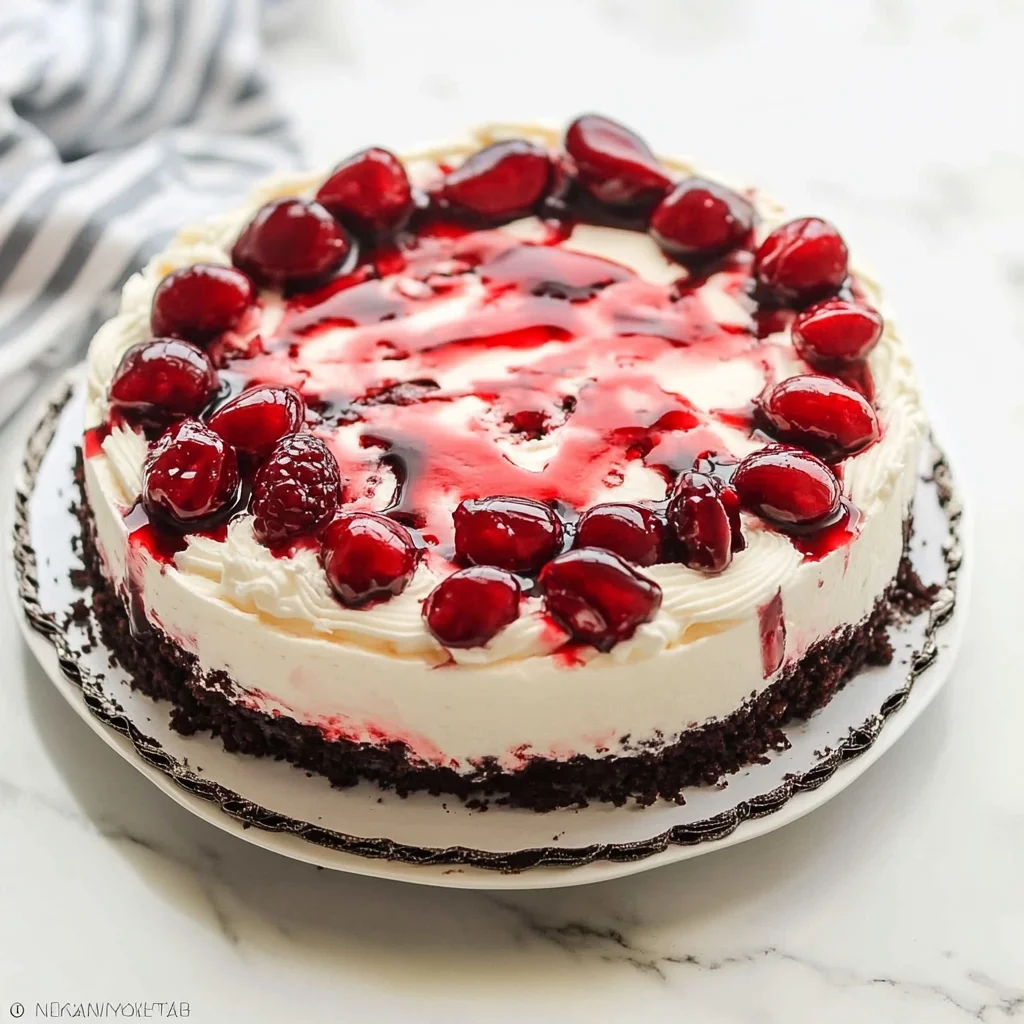
Cover your cake and refrigerate it for at least 6 hours or overnight. When ready to serve, garnish with additional whipped cream if desired, slice into pieces, and enjoy!
How to Serve No Bake Black Forest Icebox Cake
The No Bake Black Forest Icebox Cake is a delightful dessert that can be served in various ways. Whether you want to impress guests or enjoy a sweet treat at home, here are some creative serving suggestions.
With Fresh Berries
- Serve slices of the cake topped with fresh strawberries, raspberries, or blueberries for a burst of flavor and color.
Whipped Cream Garnish
- Add an extra dollop of whipped cream on top of each slice to enhance its richness and provide a beautiful finish.
Chocolate Shavings
- Sprinkle chocolate shavings over the cake before serving to add texture and a touch of elegance.
Ice Cream Pairing
- Serve alongside vanilla or chocolate ice cream for an indulgent dessert experience that complements the flavors of the cake.
Mint Leaves
- Garnish each slice with fresh mint leaves for a refreshing contrast and a pop of green on the plate.
Drizzle of Chocolate Sauce
- Add a drizzle of chocolate sauce over the top of each slice for those who crave extra sweetness.
How to Perfect No Bake Black Forest Icebox Cake
To achieve the ultimate No Bake Black Forest Icebox Cake, consider these helpful tips. They will guide you in creating a delicious and visually appealing dessert.
- Use High-Quality Ingredients: Always choose premium chocolate wafer cookies and cherry pie filling for the best flavor.
- Chill Thoroughly: Refrigerate the cake for at least 6 hours or overnight to allow it to set properly.
- Stabilize Whipped Cream: For longer-lasting whipped cream, use stabilizers like cornstarch or gelatin.
- Layer Evenly: Ensure that layers of whipped cream and cherry filling are evenly spread for balanced flavors in every bite.
- Serve Cold: This cake is best enjoyed chilled, so keep it refrigerated until ready to serve.
- Customize Flavors: Feel free to experiment by adding different fruit fillings or chocolate toppings for a unique twist!
Best Side Dishes for No Bake Black Forest Icebox Cake
Pair your No Bake Black Forest Icebox Cake with these delightful side dishes. They complement the dessert perfectly and make your meal even more enjoyable.
Fruit Salad
A refreshing mix of seasonal fruits that adds a light contrast to the rich cake.Chocolate Mousse
A creamy and airy chocolate mousse serves as an elegant pairing with this dessert.Vanilla Pudding
Smooth vanilla pudding provides a classic flavor contrast and enhances the overall sweetness.Coffee
A cup of freshly brewed coffee balances out the sweetness with its rich bitterness.Ice Cream Sundae
Create mini sundaes using scoops of ice cream topped with nuts and cherries alongside the cake.Cheese Platter
A selection of mild cheeses can provide a savory balance to the sweet flavors of your dessert.
Common Mistakes to Avoid
When making the No Bake Black Forest Icebox Cake, certain pitfalls can affect the outcome. Here are some common mistakes to steer clear of:
Skipping the chilling time: Not allowing the cake to chill for at least 6 hours can lead to a less firm texture. Always plan ahead to refrigerate overnight for best results.
Using warm cream: Whipping cream that is not chilled will not reach stiff peaks. Ensure your heavy cream is cold from the fridge before whipping.
Overfilling layers: Adding too much whipped cream or cherry pie filling in each layer can make the cake soggy. Stick to one-third of each ingredient per layer for balanced flavor and texture.
Not using a springform pan: A regular baking dish may make it difficult to slice and serve. Opt for a 9 springform pan for easy removal and presentation.
Ignoring ingredient quality: Using low-quality cookies or cherry filling can affect taste. Choose high-quality chocolate wafer cookies and cherry pie filling for a richer flavor.
Storage & Reheating Instructions
Refrigerator Storage
- Store leftovers in an airtight container.
- The No Bake Black Forest Icebox Cake can last up to 5 days in the fridge.
- Always cover with plastic wrap or a lid to prevent drying out.
Freezing No Bake Black Forest Icebox Cake
- Wrap individual slices tightly in plastic wrap, then place them in a freezer-safe bag.
- The cake can be frozen for up to 2 months.
- Thaw in the refrigerator before serving for best texture.
Reheating No Bake Black Forest Icebox Cake
- Oven: This dessert does not need reheating; it’s best served cold.
- Microwave: If desired, microwave individual slices on low power for 10-15 seconds, being careful not to melt the cream.
- Stovetop: Not applicable, as this cake is meant to be enjoyed cold and not heated on the stovetop.

Frequently Asked Questions
Can I customize my No Bake Black Forest Icebox Cake?
Yes! You can customize this cake by adding different fruits like strawberries or raspberries instead of cherries. You may also use different flavors of pudding or cream.
How long does it take to prepare No Bake Black Forest Icebox Cake?
The preparation time for this delicious dessert is just about 15 minutes. However, remember that chilling time is essential!
Can I use homemade whipped cream?
Absolutely! Homemade whipped cream adds a delightful freshness. Just ensure it reaches stiff peaks similar to store-bought options.
What other desserts are similar to No Bake Black Forest Icebox Cake?
Similar desserts include Cherry Oreo Icebox Cake and various icebox cakes made with different flavors and fillings. They all offer a refreshing no-bake option!
Final Thoughts
The No Bake Black Forest Icebox Cake is an easy yet impressive dessert perfect for summer gatherings or weeknight treats. Its versatility allows you to switch up flavors and ingredients according to your preference, making it a fun recipe to try over and over again. Don’t hesitate to experiment with your favorite toppings or fruits!
Did You Enjoy Making This Recipe? Please rate this recipe with ⭐⭐⭐⭐⭐ or leave a comment.
📖 Recipe Card
Print
No Bake Black Forest Icebox Cake
- Total Time: 0 hours
- Yield: Serves approximately 8 people 1x
Description
Indulge in the delightful flavors of summer with this No Bake Black Forest Icebox Cake! This easy-to-make dessert requires only four simple ingredients and takes just 15 minutes of preparation. With rich chocolate wafer layers, luscious whipped cream, and sweet cherry pie filling, this cake is perfect for any occasion—from barbecues to birthday parties. The best part? No oven is needed, making it an ideal treat for hot days. Refrigerate overnight for a more intense flavor and impress your family and friends with this crowd-pleasing dessert that captures all the deliciousness of a classic Black Forest cake without the hassle.
Ingredients
- 2 packages chocolate wafer cookies (about 300g)
- 1 can cherry pie filling (540ml or 2 cups)
- 2 cups heavy whipped cream
- 1/2 cup powdered sugar
Instructions
- In a large bowl, beat the heavy whipped cream and powdered sugar on high until stiff peaks form.
- Layer chocolate wafer cookies in a 9" springform pan.
- Spread 1/3 of the whipped cream over the cookies, followed by 1/3 of the cherry pie filling.
- Repeat layering two more times for a total of three layers.
- Cover and refrigerate for at least 6 hours or overnight before slicing and serving.
- Prep Time: 15 minutes
- Cook Time: None
- Category: Dessert
- Method: No Bake
- Cuisine: American
Nutrition
- Serving Size: 1 slice (100g)
- Calories: 320
- Sugar: 22g
- Sodium: 70mg
- Fat: 21g
- Saturated Fat: 12g
- Unsaturated Fat: 7g
- Trans Fat: 0g
- Carbohydrates: 34g
- Fiber: 1g
- Protein: 3g
- Cholesterol: 70mg