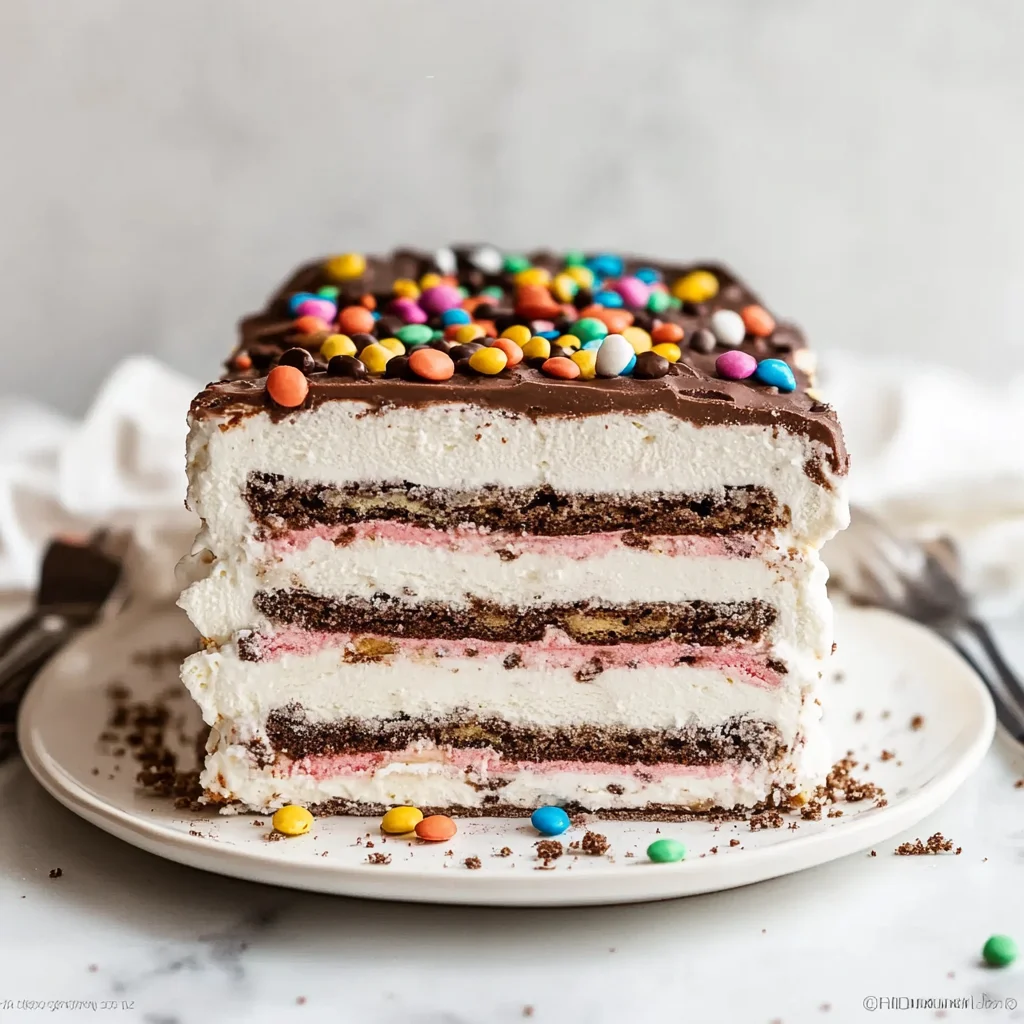
This Ice Cream Sandwich Cake is a delightful treat that combines the fun of ice cream sandwiches with a cake-like presentation. Perfect for birthdays, summer parties, or just a sweet craving, this no-bake dessert is easy to make and customize. With its creamy chocolate layers and crunchy toppings, it’s sure to impress guests of all ages.
Jump to:
- Why You’ll Love This Recipe
- Tools and Preparation
- Essential Tools and Equipment
- Importance of Each Tool
- Ingredients
- For the Cake
- For Toppings
- How to Make Ice Cream Sandwich Cake
- Step 1: Thaw the Ice Cream
- Step 2: Prepare Your Workspace
- Step 3: Lay Down Plastic Wrap
- Step 4: Assemble the First Layer
- Step 5: Add Chocolate Ice Cream
- Step 6: Build Additional Layers
- Step 7: Finish with Last Layer
- Step 8: Wrap It Up
- Step 9: Freeze
- Step 10: Frosting Time
- Step 11: Slice and Serve
- How to Serve Ice Cream Sandwich Cake
- Personalize with Toppings
- Create Sundae Bowls
- Pair with Beverages
- How to Perfect Ice Cream Sandwich Cake
- Best Side Dishes for Ice Cream Sandwich Cake
- Common Mistakes to Avoid
- Storage & Reheating Instructions
- Refrigerator Storage
- Freezing Ice Cream Sandwich Cake
- Reheating Ice Cream Sandwich Cake
- Frequently Asked Questions
- How long does Ice Cream Sandwich Cake last?
- Can I customize my Ice Cream Sandwich Cake?
- What is the best way to serve Ice Cream Sandwich Cake?
- Is this recipe suitable for parties?
- Final Thoughts
- 📖 Recipe Card
Why You’ll Love This Recipe
- Quick to Prepare: With minimal prep time, you can whip up this dessert in just 10 minutes.
- No Baking Required: Enjoy a delicious cake without turning on the oven, making it ideal for hot days.
- Easily Customizable: Swap out ingredients or add your favorite toppings for a unique twist every time.
- Feeds a Crowd: This recipe yields 12 servings, so it’s perfect for gatherings or family events.
- Kid-Friendly Fun: Kids will love helping to assemble this cake and choosing their favorite toppings!
Tools and Preparation
Before you start making your Ice Cream Sandwich Cake, gather your tools. Having everything ready will make the process smooth and enjoyable.
Essential Tools and Equipment
- Large cutting board or sheet pan
- Plastic wrap
- Mixing spatula
- Freezer-safe container
Importance of Each Tool
- Large cutting board or sheet pan: Provides ample space for assembling the cake without mess.
- Plastic wrap: Keeps the cake airtight while freezing, ensuring it maintains its shape and flavor.
Ingredients
This Ice Cream Sandwich Cake is made with just SIX ingredients or less, with no baking and a ton of easy ways to customize it! Full step by step recipe video in the recipe card.
For the Cake
- 15 ice cream sandwiches
- 2 litres chocolate ice cream
- 1 litre frozen whipped topping (thawed)
For Toppings
- 3 tablespoons chocolate fudge sauce
- 3 tablespoons mini M&Ms
- 6 Oreos (crushed)
How to Make Ice Cream Sandwich Cake
Step 1: Thaw the Ice Cream
Remove the ice cream from the freezer and let thaw for 15-20 minutes before beginning.
Step 2: Prepare Your Workspace
Find a large cutting board or sheet pan to build your ice cream sandwich cake on.
Step 3: Lay Down Plastic Wrap
Place two long sheets of plastic wrap over the cutting board, one going each direction so there is lots of overhang.
Step 4: Assemble the First Layer
Place a single row of 5 ice cream sandwiches in the middle of the plastic wrap.
Step 5: Add Chocolate Ice Cream
Top with half of the chocolate ice cream, spreading into as even a layer as possible.
Step 6: Build Additional Layers
Top with 5 more ice cream sandwiches, and then add the remaining half of the chocolate ice cream, spreading it into an even layer.
Step 7: Finish with Last Layer
Top with the last 5 ice cream sandwiches. Press down gently to compact it all together.
Step 8: Wrap It Up
Wrap plastic wrap tightly around your ice cream sandwich cake. You can reshape it slightly if it’s not straight once wrapped.
Step 9: Freeze
Freeze for at least 4-6 hours. You can also freeze up to 3 months before unwrapping and serving.
Step 10: Frosting Time
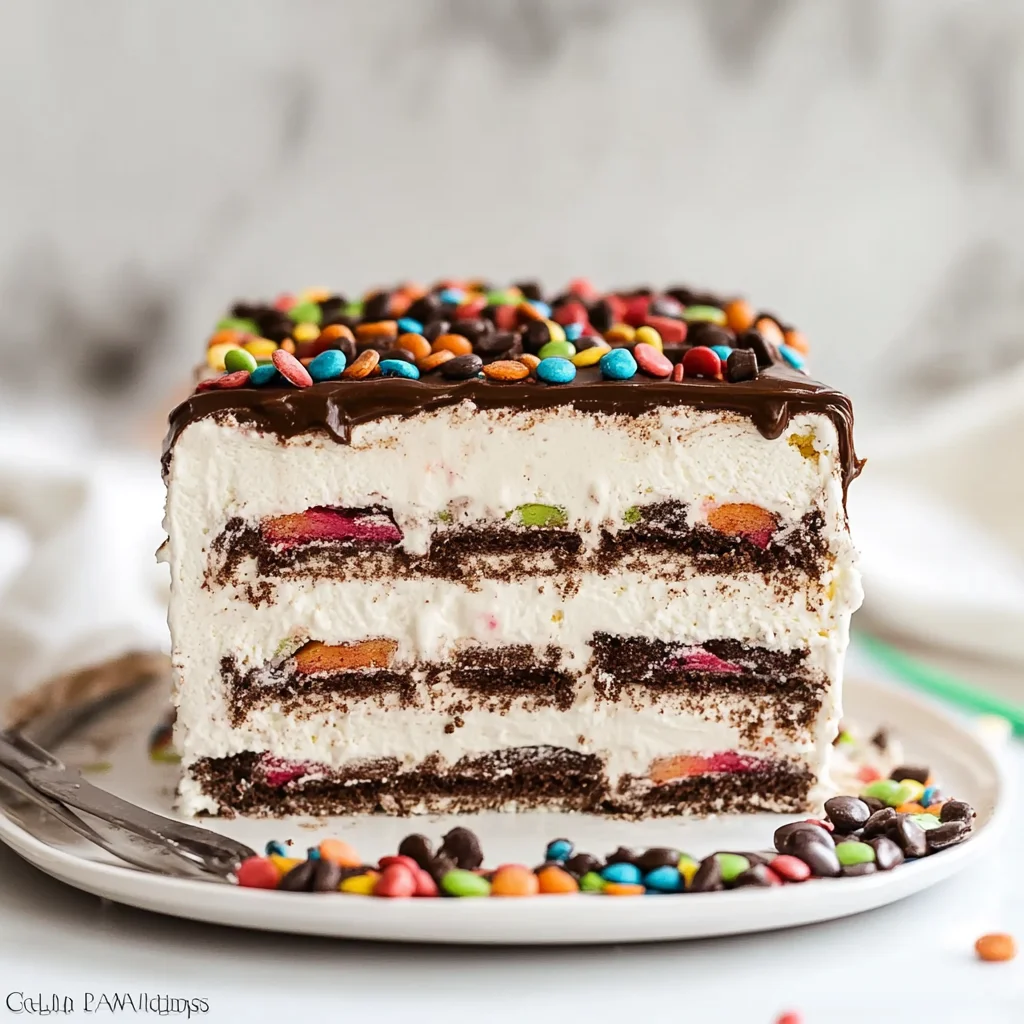
To serve, unwrap and frost top and sides with thawed whipped topping. Drizzle with chocolate sauce and sprinkle with M&Ms and crushed Oreos.
Step 11: Slice and Serve
Slice into pieces and serve or place back in the freezer until you’re ready to enjoy!
How to Serve Ice Cream Sandwich Cake
Serving Ice Cream Sandwich Cake is simple and fun! This dessert can be enjoyed in various ways, making it perfect for any occasion. Here are some serving suggestions to elevate your ice cream experience.
Personalize with Toppings
- Sprinkles: Add a colorful touch with rainbow or chocolate sprinkles on top of the whipped cream.
- Fresh Fruit: Serve with sliced strawberries or bananas for a refreshing twist.
- Nuts: Sprinkle some chopped nuts like almonds or walnuts for added crunch.
Create Sundae Bowls
- Sundae Style: Cut the cake into squares and place in a bowl. Top with hot fudge, whipped cream, and cherries.
- Layered Parfait: Crumble pieces of the cake into a glass and layer with whipped topping and fruit.
Pair with Beverages
- Milkshakes: Blend leftover cake pieces with milk for a creamy milkshake.
- Coffee: Serve alongside a cup of coffee for a delightful contrast in flavors.
How to Perfect Ice Cream Sandwich Cake
Making the perfect Ice Cream Sandwich Cake is easy when you follow these tips. Here’s how to ensure your dessert turns out delicious every time.
- Chill Your Ingredients: Make sure all components are cold before assembling. This keeps the cake firm.
- Layer Evenly: Spread ice cream evenly between layers for consistent flavor in each bite.
- Use Quality Toppings: Opt for high-quality chocolate sauce and fresh fruits to enhance the taste.
- Freeze Thoroughly: Allow enough time for freezing; 4-6 hours ensures that it holds its shape when sliced.
- Customize Flavors: Experiment with different ice cream flavors or toppings based on personal preference.

Best Side Dishes for Ice Cream Sandwich Cake
Pairing side dishes with your Ice Cream Sandwich Cake can make your dessert spread even more delightful. Here are some great options to consider.
- Fruit Salad: A light mix of seasonal fruits complements the sweetness of the cake.
- Chocolate Chip Cookies: Serve classic cookies alongside for an extra treat during dessert time.
- Brownies: Rich, fudgy brownies pair well with the creamy texture of the cake.
- Pineapple Upside Down Cake: The tropical flavors balance nicely with ice cream desserts.
- Mini Cheesecakes: Individual cheesecakes provide a rich flavor that contrasts well with lighter desserts.
- Frozen Grapes: These offer a refreshing and healthy alternative that can cleanse the palate after rich desserts.
Common Mistakes to Avoid
When making your Ice Cream Sandwich Cake, it’s easy to overlook some important steps. Here are some common mistakes and how to avoid them.
- Skipping Thawing Time: If you don’t let the ice cream soften for 15-20 minutes, it will be hard to spread evenly. Always allow the ice cream to thaw for better layering.
- Not Using Enough Plastic Wrap: Failing to use enough overhang on the plastic wrap can make it difficult to cover the cake completely. Ensure there’s plenty of wrap to seal in freshness.
- Uneven Layering: If you don’t spread the ice cream evenly, it can lead to uneven freezing and slicing. Take your time to create flat layers for a beautiful presentation.
- Ignoring Freezing Time: Rushing the freezing process can result in a mushy cake. Make sure to freeze your Ice Cream Sandwich Cake for at least 4-6 hours or longer for best results.
- Overfilling with Toppings: While toppings add flavor, too many can overpower the cake. Stick to a balanced amount of toppings like chocolate sauce and crushed Oreos.
Storage & Reheating Instructions
Refrigerator Storage
- item Store leftover cake in an airtight container.
- item It will last about 3 days in the refrigerator.
- item Cover any exposed areas with plastic wrap to prevent freezer burn.
Freezing Ice Cream Sandwich Cake
- item You can freeze this cake for up to 3 months without losing flavor.
- item Wrap tightly with plastic wrap and then foil for extra protection.
- item Label the container with the date and contents for easy identification.
Reheating Ice Cream Sandwich Cake
- Oven: Preheat your oven to 350°F (175°C). Place slices on a baking sheet for about 5-10 minutes until warm.
- Microwave: Heat individual slices for about 15-20 seconds on medium power. Check regularly to avoid melting too much.
- Stovetop: Use a non-stick skillet on low heat. Place slices in the skillet with a lid on until warmed through, about 5 minutes.
Frequently Asked Questions
How long does Ice Cream Sandwich Cake last?
The Ice Cream Sandwich Cake can last up to 3 months in the freezer if wrapped properly. In the refrigerator, it stays fresh for about 3 days.
Can I customize my Ice Cream Sandwich Cake?
Yes! You can customize your Ice Cream Sandwich Cake by using different flavors of ice cream or adding various toppings such as nuts, sprinkles, or even different cookie types between layers.
What is the best way to serve Ice Cream Sandwich Cake?
For serving, slice directly from the frozen state using a hot knife. This ensures clean cuts without melting messiness.
Is this recipe suitable for parties?
Absolutely! The Ice Cream Sandwich Cake serves12 people easily, making it perfect for gatherings or celebrations.
Final Thoughts
This Ice Cream Sandwich Cake is not only simple but also incredibly versatile. With just six ingredients, you can whip up a delightful dessert that everyone will love. The customization options mean you can adapt it for any occasion, making it a go-to recipe whenever you’re craving something sweet! Try it out and enjoy all the delicious possibilities!
Did You Enjoy Making This Recipe? Please rate this recipe with ⭐⭐⭐⭐⭐ or leave a comment.
📖 Recipe Card
Print
Ice Cream Sandwich Cake
- Total Time: 0 hours
- Yield: Serves 12 1x
Description
Ice Cream Sandwich Cake is a delightful, no-bake dessert that brings together the joy of ice cream sandwiches and the elegance of a cake. With layers of creamy chocolate ice cream and crunchy toppings, this dessert is perfect for summer parties, birthdays, or whenever you’re craving something sweet. It takes just 10 minutes to prepare, making it an easy choice for any occasion. Plus, it’s fully customizable—swap flavors or add your favorite toppings to make it uniquely yours. This crowd-pleaser serves up to 12 people, ensuring that everyone gets a delicious slice of this frosty treat.
Ingredients
- 15 ice cream sandwiches
- 2 liters chocolate ice cream
- 1 liter frozen whipped topping (thawed)
- 3 tablespoons chocolate fudge sauce (for topping)
- 3 tablespoons mini M&Ms (for topping)
- 6 Oreos (crushed, for topping)
Instructions
- Thaw the chocolate ice cream for 15-20 minutes.
- Lay two sheets of plastic wrap on a cutting board.
- Arrange five ice cream sandwiches in the center.
- Spread half of the thawed chocolate ice cream over the sandwiches.
- Add another layer of five ice cream sandwiches and the remaining chocolate ice cream.
- Finish with a final layer of five ice cream sandwiches, pressing gently to compact.
- Wrap tightly with plastic wrap and freeze for at least 4-6 hours.
- Once frozen, frost with thawed whipped topping and add toppings as desired.
- Slice and serve cold.
- Prep Time: 10 minutes
- Cook Time: None
- Category: Dessert
- Method: No-Bake
- Cuisine: American
Nutrition
- Serving Size: 1 serving
- Calories: 290
- Sugar: 24g
- Sodium: 150mg
- Fat: 14g
- Saturated Fat: 9g
- Unsaturated Fat: 3g
- Trans Fat: 0g
- Carbohydrates: 38g
- Fiber: <1g
- Protein: 4g
- Cholesterol: 30mg