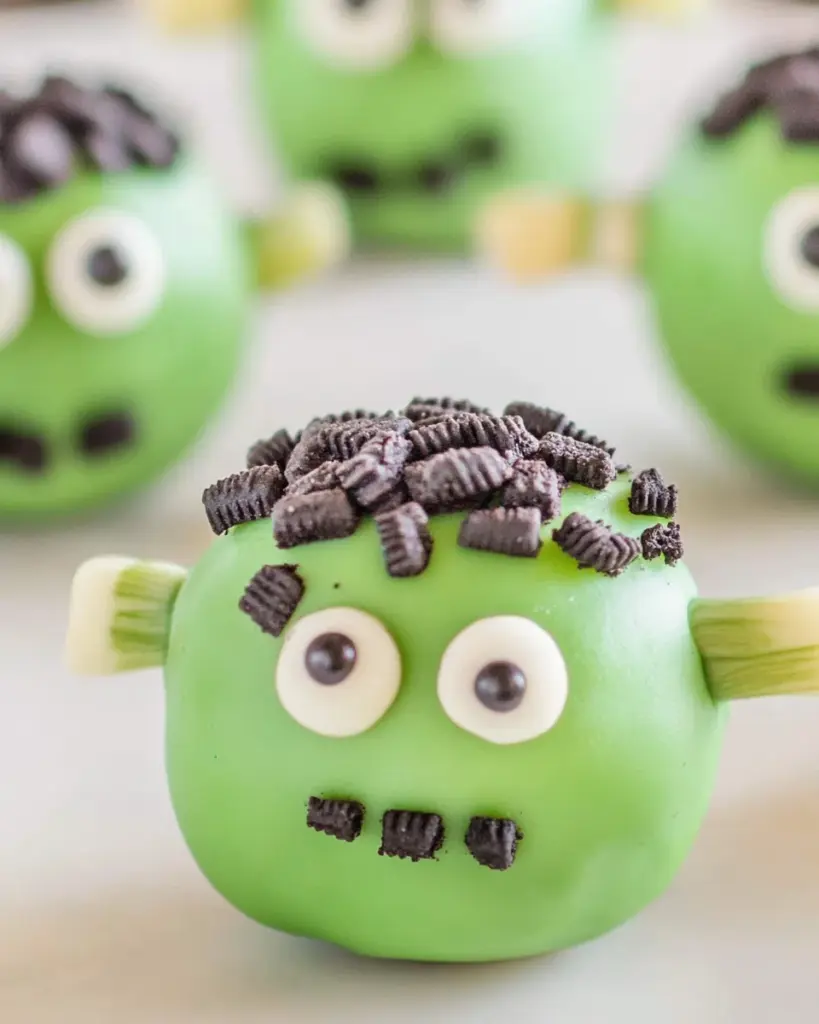
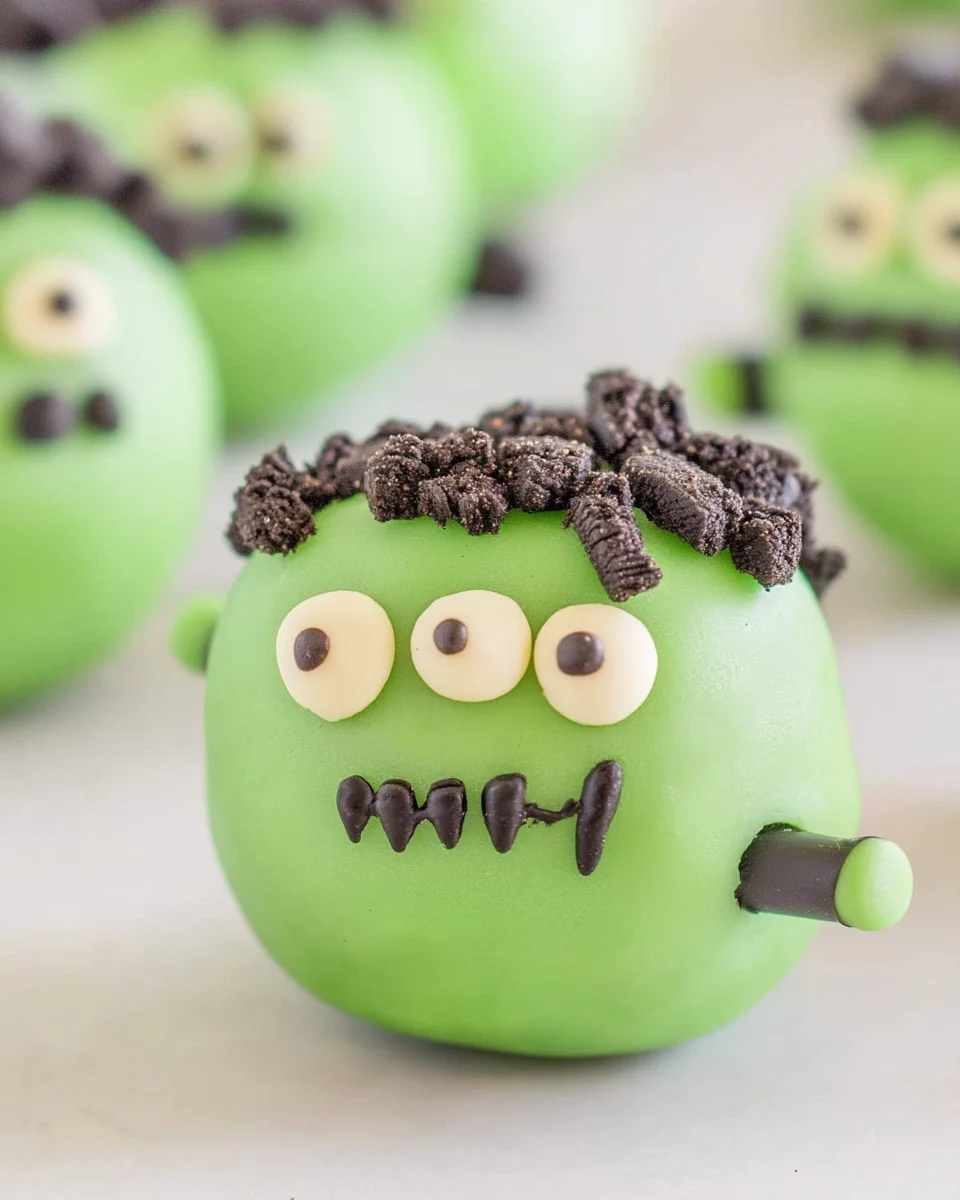
Frankenstein Oreo Balls are the perfect spooky treat for Halloween! These delicious no-bake bites combine crushed Oreos and cream cheese, creating a rich, creamy interior. Dipped in light green candy melts and decorated to look like Frankenstein, they are sure to be a hit at any Halloween gathering or festive event. Not only do they taste amazing, but their fun monster appearance will delight both kids and adults alike.

Jump to:
- Why You’ll Love This Recipe
- Tools and Preparation
- Essential Tools and Equipment
- Importance of Each Tool
- Ingredients
- Base Ingredients
- Coating Ingredients
- Decorative Ingredients
- How to Make Frankenstein Oreo Balls
- Step 1: Combine Base Ingredients
- Step 2: Shape the Oreo Balls
- Step 3: Chill the Balls
- Step 4: Prepare Melting Wafers
- Step 5: Dip in Green Chocolate
- Step 6: Add Features
- Step 7: Pipe on Details
- Step 8: Final Chill Before Serving
- How to Serve Frankenstein Oreo Balls
- Fun Halloween Platter
- Individual Treat Bags
- Halloween Dessert Table
- Themed Drink Pairing
- Kids’ Party Treats
- Movie Night Snack
- How to Perfect Frankenstein Oreo Balls
- Best Side Dishes for Frankenstein Oreo Balls
- Common Mistakes to Avoid
- Refrigerator Storage
- Freezing Frankenstein Oreo Balls
- Reheating Frankenstein Oreo Balls
- Frequently Asked Questions
- What are Frankenstein Oreo Balls?
- How can I customize my Frankenstein Oreo Balls?
- Can I make these ahead of time?
- What if I don’t have melting wafers?
- Final Thoughts
- 📖 Recipe Card
Why You’ll Love This Recipe
- Easy to Make: With just a few steps, you can whip up these delightful treats without any baking involved.
- Kid-Friendly: This recipe is perfect for kids to help with, making it a fun family activity leading up to Halloween.
- Customizable Decorations: You can get creative with how you decorate your Frankenstein Oreo Balls to match your style or party theme.
- No Baking Required: Enjoy the simplicity of making these treats without turning on the oven.
- Perfectly Themed: These Oreo balls fit perfectly into any Halloween celebration with their spooky yet adorable design.
Tools and Preparation
Before getting started, gather your tools and equipment. Having everything ready will make the process smooth and enjoyable.
Essential Tools and Equipment
- Mixing bowl
- Electric mixer or stand mixer
- Cookie scoop (2 tablespoons)
- Parchment paper
- Microwave-safe bowl
- Forks or dipping tools
- Ziploc bag (sandwich size)
- Scissors
Importance of Each Tool
- Mixing bowl: Necessary for combining ingredients thoroughly.
- Electric mixer or stand mixer: Makes mixing quick and ensures a smooth dough consistency.
- Cookie scoop: Helps create even-sized balls for uniformity.
- Microwave-safe bowl: Ideal for melting the candy wafers safely.
Ingredients
To make Frankenstein Oreo Balls, you will need the following ingredients:
Base Ingredients
- 36 Oreos (finely crushed)
- 8 oz cream cheese (softened at room temperature)
- 1 teaspoon vanilla extract
Coating Ingredients
- 2 cups light green melting wafers
- ½ cup black or dark chocolate melting wafers
- 1-½ tablespoons crisco shortening
Decorative Ingredients
- Black sprinkles (long not round)
- Pretzel sticks
- Small candy eyes
How to Make Frankenstein Oreo Balls
Step 1: Combine Base Ingredients
In a large mixing bowl, combine the crushed Oreos, softened cream cheese, and vanilla extract. Mix using an electric hand mixer or stand mixer for about 1-2 minutes until everything is fully combined into a dough-like mixture.
Step 2: Shape the Oreo Balls
Using a 2-tablespoon cookie scoop, scoop the dough from the bowl. Form it into an even, smooth ball by rolling it between your palms. Place each ball on a large cookie sheet lined with parchment paper. Flatten each ball slightly by pressing down gently on all sides until it resembles a square shape.
Step 3: Chill the Balls
Place the cookie sheet in the refrigerator to chill for 2 hours. This step helps firm up the balls before coating them.
Step 4: Prepare Melting Wafers
As the chilling time nears its end, prepare the light green melting wafers. In a microwave-safe bowl, heat the wafers at 50% power for 1 minute. Stir well and add 1 tablespoon of crisco, then return to the microwave in additional 30-second bursts until melted and smooth.
Step 5: Dip in Green Chocolate
Dip each chilled Oreo bite into the melted green chocolate using two forks or dipping tools. Ensure they are fully coated before placing them back on the cookie sheet. Gently shake off any excess chocolate.
Step 6: Add Features
Immediately dip one side of each square into black sprinkles to create Frankenstein’s hair. Place small candy eyes onto the front face of each bite. Break off about 1-inch lengths from pretzel sticks and press them into either side of each head as bolts.
Step 7: Pipe on Details
Melt the black chocolate or dark melting wafers with crisco using similar steps as before. Once melted, transfer it to a small Ziploc bag. Cut off a tiny corner of the bag to pipe details onto each bite—create smiles or zig-zag lines as desired.
Step 8: Final Chill Before Serving
Allow your Frankenstein Oreo Balls to chill in the refrigerator for another 30 minutes before serving them at your Halloween festivities!
How to Serve Frankenstein Oreo Balls
Frankenstein Oreo Balls are not only delicious but also a fun treat for Halloween gatherings. Serving them creatively can elevate your presentation and impress your guests.
Fun Halloween Platter
- Arrange the Oreo balls on a spooky-themed platter surrounded by candy corn or gummy worms. This adds a festive touch to your dessert table.
Individual Treat Bags
- Place each Oreo ball in small, clear treat bags tied with black or green ribbons. These make great party favors for guests to take home.
Halloween Dessert Table
- Include the Frankenstein Oreo Balls as part of a larger dessert table featuring other treats like cupcakes and cookies. This will create an eye-catching display that draws attention.
Themed Drink Pairing
- Serve with themed drinks like green punch or spooky cocktails. The contrast of flavors will enhance the overall experience of your Halloween celebration.
Kids’ Party Treats
- Use larger cupcake liners to hold the Oreo balls and place them on tables at children’s parties. Kids will love picking up their own monster treats!
Movie Night Snack
- Pair the Frankenstein Oreo Balls with popcorn and candy for a fun movie night. They add a sweet touch to classic snack options.
How to Perfect Frankenstein Oreo Balls
To achieve the best results when making Frankenstein Oreo Balls, keep these tips in mind:
- Chill Your Mixture: Allow the cream cheese and Oreo mixture to chill before shaping. This firm texture makes it easier to form perfect balls.
- Use Fresh Ingredients: Ensure your cream cheese is fresh for the best flavor and consistency while mixing.
- Melt Chocolate Carefully: Heat melting wafers slowly in short bursts, stirring often to prevent burning. A smooth coating is essential for a professional finish.
- Be Creative with Decorations: Don’t be afraid to experiment with different sprinkles or edible decorations for unique designs that reflect your style.
- Keep Them Cool: Store the finished Oreo balls in the refrigerator until ready to serve. This helps maintain their shape and texture.
- Practice Your Piping: Take your time when piping chocolate designs on top of each ball. Practice on parchment paper if you’re unsure of your technique.
Best Side Dishes for Frankenstein Oreo Balls
Serving side dishes that complement your Frankenstein Oreo Balls can enhance your Halloween feast. Here are some tasty options:
- Monster Mac and Cheese – A creamy, cheesy pasta dish that kids will adore, colored with green food dye for added fun.
- Witch’s Brew Soup – A hearty vegetable soup served in cauldrons or bowls decorated with cobwebs.
- Ghostly Veggie Platter – Fresh vegetables arranged creatively with dip; use ghost-shaped cutouts from cheese slices as decoration.
- Spooky Pizza Bites – Mini pizzas topped with pepperoni cut into bat shapes, perfect finger food for parties.
- Creepy Cucumber Sandwiches – Lightly seasoned cucumber slices between bread, shaped like ghosts or monsters using cookie cutters.
- Graveyard Taco Dip – Layers of refried beans, guacamole, and sour cream topped with crumbled tortilla chips resembling dirt; serve with chips.
- Eyeball Pasta Salad – Pasta salad mixed with mozzarella balls (eyeballs) and olives that represent pupils—an eerie sight!
- Blood Red Punch – A fruity red punch served in goblets makes a perfect drink accompaniment to balance out sweetness from dessert treats.
These side dishes will ensure a memorable Halloween spread that pairs beautifully with your Frankenstein Oreo Balls!
Common Mistakes to Avoid
When making Frankenstein Oreo Balls, it’s easy to overlook some important details. Here are common mistakes you should avoid to ensure your treats turn out perfectly.
- Skipping the chilling step: Failing to chill the balls can lead to a soft texture that won’t hold its shape. Always refrigerate them for at least 2 hours.
- Overheating the melting wafers: Heating melting wafers too long can cause them to seize. Always heat in short bursts and stir in between.
- Not using enough cream cheese: Insufficient cream cheese will make the dough too dry. Stick to the recommended 8 oz for the right consistency.
- Ignoring decoration details: Neglecting to add eyes or hair will make your Frankenstein Oreo Balls less appealing. Take time to decorate with pretzel sticks and candy eyes for a fun look.
- Inconsistent ball sizes: Making uneven balls can lead to uneven melting and decoration. Use a cookie scoop for uniformity.
Refrigerator Storage
- Store in an airtight container for up to one week.
- Place parchment paper between layers if stacking, preventing sticking.
Freezing Frankenstein Oreo Balls
- Freeze in an airtight container for up to three months.
- Separate layers with parchment paper to maintain shape during freezing.
Reheating Frankenstein Oreo Balls
- Oven: Preheat to 350°F (175°C) and warm for about 10 minutes. Keep them covered with foil.
- Microwave: Heat on low power in 10-15 second intervals until slightly warm, but not melted.
- Stovetop: Place in a pan over low heat, cover, and warm gently while flipping occasionally.
Frequently Asked Questions
What are Frankenstein Oreo Balls?
Frankenstein Oreo Balls are no-bake treats made from crushed Oreos, cream cheese, and decorated like Frankenstein. They’re perfect for Halloween!
How can I customize my Frankenstein Oreo Balls?
You can customize them by using different colored melting wafers or adding sprinkles of your choice. The design is fully flexible based on your creativity!
Can I make these ahead of time?
Yes! You can prepare Frankenstein Oreo Balls a few days in advance or freeze them for longer storage.
What if I don’t have melting wafers?
If you can’t find melting wafers, you can substitute with tempered chocolate or regular chocolate chips by adding a bit of shortening.
Final Thoughts
Frankenstein Oreo Balls offer a delightful combination of flavors and fun presentation that makes them perfect for any Halloween gathering. They are versatile treats that allow room for creativity with decorations. Try this recipe today and personalize it according to your taste!
Did You Enjoy Making This Recipe? Please rate this recipe with ⭐⭐⭐⭐⭐ or leave a comment.
📖 Recipe Card
Print
Frankenstein Oreo Balls
- Total Time: 30 minutes
- Yield: Approximately 18 servings 1x
Description
Frankenstein Oreo Balls are the ultimate no-bake treat for Halloween, combining the beloved flavors of crushed Oreos and cream cheese into a whimsical dessert that’s both delicious and fun. These spooky bites are coated in vibrant light green candy melts and decorated to resemble Frankenstein’s monster, making them a hit at any festive gathering. Not only are they easy to make, but they also provide a delightful opportunity for kids and adults alike to get creative with decorations. Perfect for Halloween parties, these treats will surely impress your guests while satisfying their sweet tooth.
Ingredients
- 36 Oreos (finely crushed)
- 8 oz cream cheese (softened)
- 1 teaspoon vanilla extract
- 2 cups light green melting wafers
- ½ cup black or dark chocolate melting wafers
- Black sprinkles (long)
- Pretzel sticks
- Small candy eyes
Instructions
- In a mixing bowl, combine crushed Oreos, softened cream cheese, and vanilla extract. Mix until smooth.
- Use a cookie scoop to form even balls from the mixture and place them on parchment-lined cookie sheets.
- Chill for 2 hours to firm up.
- Melt light green candy wafers in a microwave-safe bowl, heating in short bursts until smooth.
- Dip each chilled ball in the melted green chocolate, ensuring complete coverage.
- Immediately add black sprinkles for hair and place candy eyes on each ball. Insert pretzel pieces as bolts.
- Pipe details using melted dark chocolate if desired.
- Chill again for 30 minutes before serving.
- Prep Time: 30 minutes
- Cook Time: 0 minutes
- Category: Dessert
- Method: No-Bake
- Cuisine: American
Nutrition
- Serving Size: 1 Oreo Ball
- Calories: 130
- Sugar: 10g
- Sodium: 50mg
- Fat: 8g
- Saturated Fat: 4g
- Unsaturated Fat: 3g
- Trans Fat: 0g
- Carbohydrates: 14g
- Fiber: 1g
- Protein: 1g
- Cholesterol: 15mg