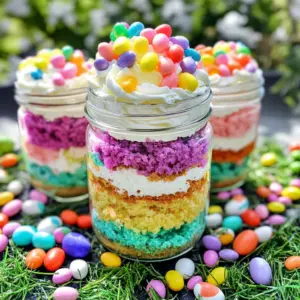
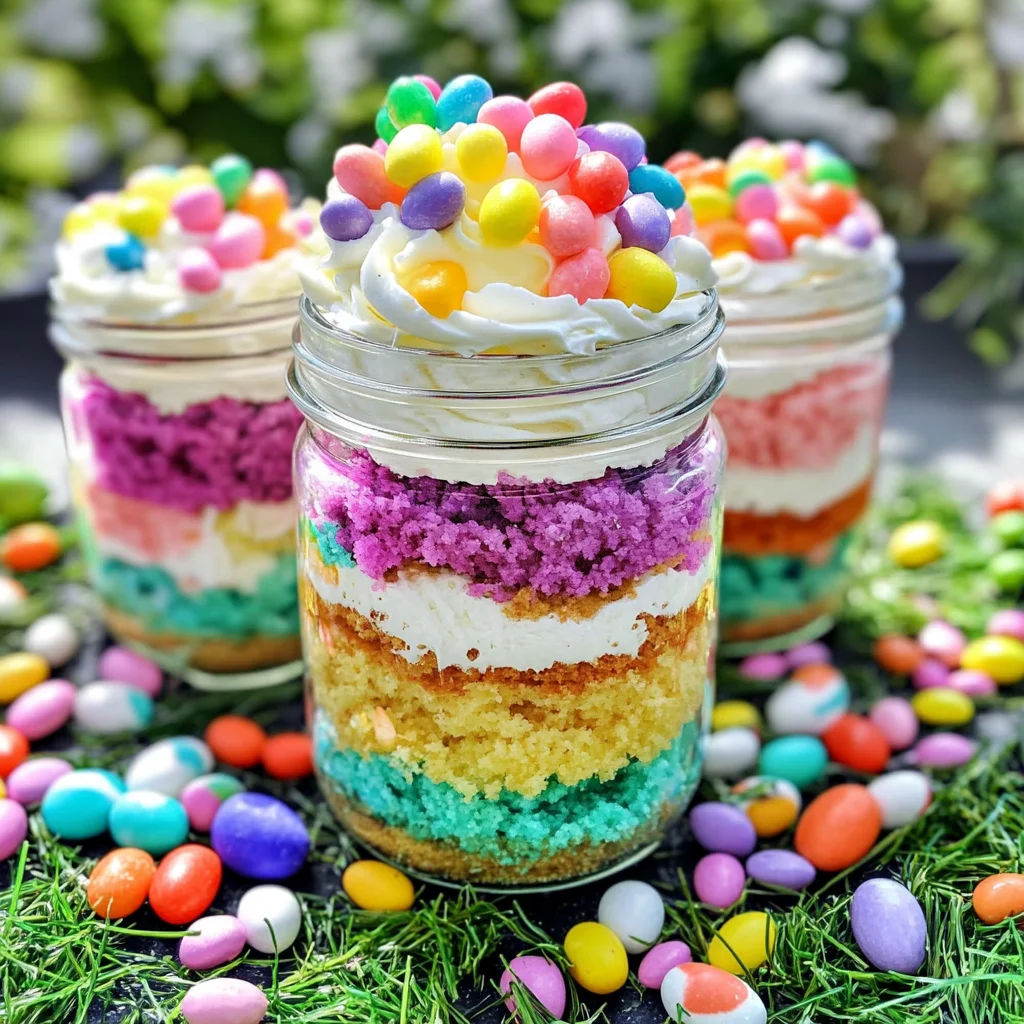
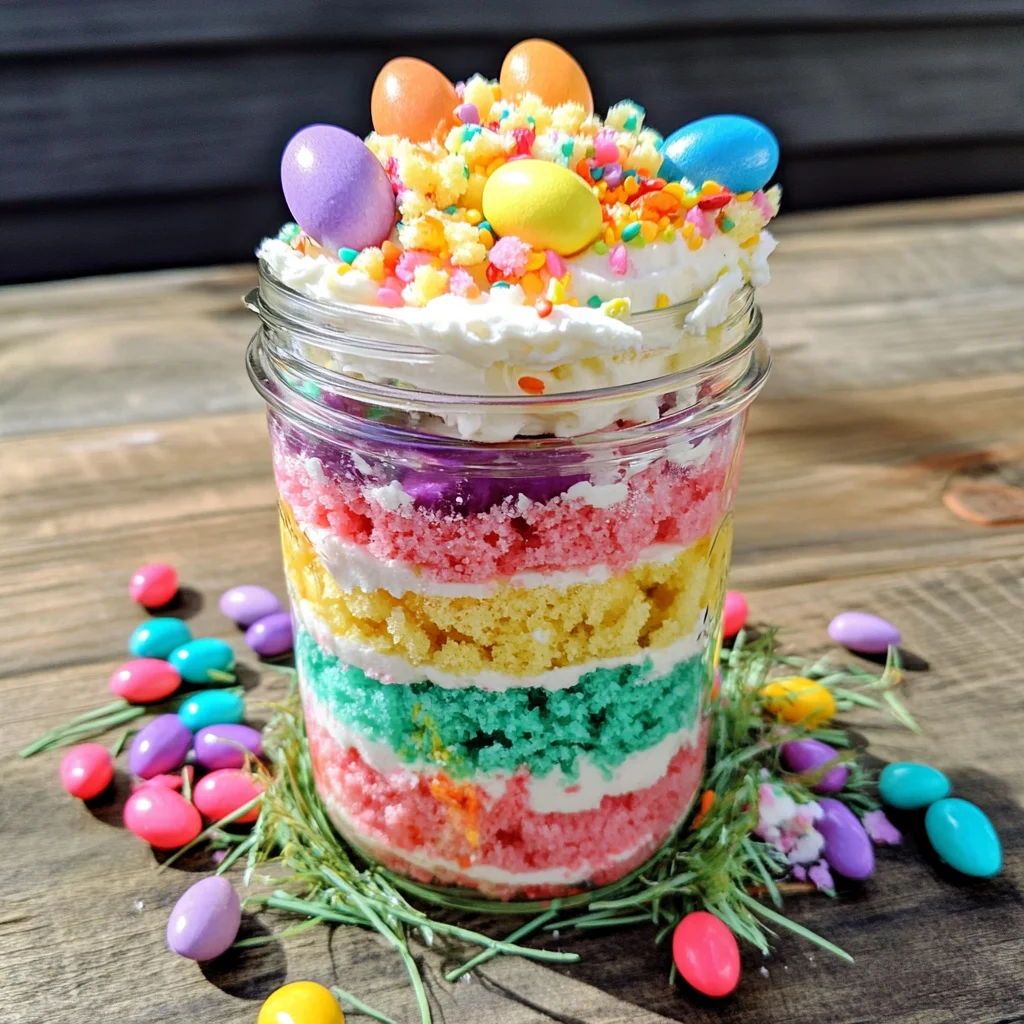
Easter Cake in a Jar is a delightful and vibrant dessert that offers a fun twist on traditional cupcakes. Perfect for Easter celebrations, birthday parties, or any festive gathering, this make-ahead treat captures the spirit of spring with its colorful layers and playful decorations. Each jar is not only visually appealing but also allows for easy serving and transport. You might find yourself sneaking a taste before your guests arrive!
Jump to:
- Why You’ll Love This Recipe
- Tools and Preparation
- Essential Tools and Equipment
- Importance of Each Tool
- Ingredients
- For the Cake
- For the Frosting and Decoration
- For Serving
- How to Make Easter Cake in a Jar
- Step 1: Prepare the Batter
- Step 2: Bake the Cupcakes
- Step 3: Crumble the Cupcakes
- Step 4: Prepare for Layering
- Step 5: Assemble Your Jars
- Step 6: Decorate Your Jars
- How to Serve Easter Cake in a Jar
- For Family Gatherings
- At Easter Brunch
- During Easter Egg Hunts
- At Parties or Celebrations
- How to Perfect Easter Cake in a Jar
- Best Side Dishes for Easter Cake in a Jar
- Common Mistakes to Avoid
- Storage & Reheating Instructions
- Refrigerator Storage
- Freezing Easter Cake in a Jar
- Reheating Easter Cake in a Jar
- Frequently Asked Questions
- Can I use different cake flavors?
- How do I make this gluten-free?
- Can I prepare it ahead of time?
- What other decorations can I use?
- Can I use larger jars for this recipe?
- Final Thoughts
- 📖 Recipe Card
Why You’ll Love This Recipe
- Fun Presentation: The layered look in jars makes it an eye-catching dessert that will impress your guests.
- Make-Ahead Option: Prep this Easter Cake in a Jar ahead of time to save yourself stress on the day of the celebration.
- Customizable Flavors: You can easily change up the colors and flavors to suit different occasions or personal preferences.
- Kid-Friendly: This recipe is great for kids to help with, making it a perfect family activity during Easter.
- Portable Treats: Individual jars make it easy to take these cakes on picnics or potlucks without worrying about mess.
Tools and Preparation
Before you start baking your Easter Cake in a Jar, gather the essential tools and equipment you’ll need to ensure everything goes smoothly.
Essential Tools and Equipment
- 4-6 oz. Jars
- Mixing Bowls
- Cupcake Tins
- Piping Bag (or plastic bag)
- Oven
Importance of Each Tool
- Jars: These are perfect for layering your cake and frosting, providing both style and convenience.
- Piping Bag: Using a piping bag helps create neat layers of frosting that enhance the visual appeal of your dessert.
Ingredients
Here’s what you will need to create your Easter Cake in a Jar:
For the Cake
- 1 White Cake Mix, make batter per package directions
- Food Coloring—pink, yellow, teal, purple
For the Frosting and Decoration
- 1 Can White Frosting
- Edible Easter Grass
- Jelly Bean Easter Eggs
- Optional: Easter Sprinkles
For Serving
- 4 Jars—4-6 oz.
How to Make Easter Cake in a Jar
Step 1: Prepare the Batter
- Divide the cake batter into 4 small bowls.
- Color each bowl of batter with one of the food coloring options.
Step 2: Bake the Cupcakes
- Scoop the colored batter into cupcake tins.
- Bake according to package directions until done.
Step 3: Crumble the Cupcakes
- Let the cupcakes cool completely.
- Crumble them into separate bowls while keeping color separation.
Step 4: Prepare for Layering
- Place the frosting into a plastic bag.
- Cut off one corner of the bag to use it as a piping bag.
Step 5: Assemble Your Jars
- Start by placing a scoop of purple cake at the bottom of each jar.
- Pipe a thin layer of frosting over it.
- Repeat this process with each color of cake, ensuring that frosting touches jar edges for visibility.
Step 6: Decorate Your Jars
- Top each jar with edible grass and jellybean eggs to create an appealing nest-like appearance.
- Alternatively, sprinkle some Easter sprinkles on top for added color.
Now you’re ready to serve these delightful jars at your next gathering!
How to Serve Easter Cake in a Jar
Easter Cake in a Jar is not only visually appealing but also incredibly versatile when it comes to serving. Here are some fun and creative ways to present this delightful dessert at your next gathering.
For Family Gatherings
- Personalized Jars: Use jars with names or initials on them for a personal touch.
- Mix and Match Flavors: Encourage guests to mix different flavors by providing assorted cake jars.
At Easter Brunch
- Mini Dessert Table: Arrange several jars on a decorative tray as part of a mini dessert table.
- Accompanying Beverages: Pair with fresh juices or flavored sparkling water for a refreshing combo.
During Easter Egg Hunts
- Grab-and-Go Treats: Offer jars as take-home treats for kids after the hunt.
- Fun Packaging: Wrap each jar in colorful cellophane for an extra festive look.
At Parties or Celebrations
- Layered Display: Create a visually stunning layered display with different colors of jars stacked on each other.
- Themed Decorations: Decorate the table with Easter-themed decorations such as bunnies and eggs.
How to Perfect Easter Cake in a Jar
To ensure your Easter Cake in a Jar turns out perfectly, consider these helpful tips.
- bold Use Fresh Ingredients: Using fresh ingredients will enhance the flavor of your cake.
- bold Allow Cakes to Cool Completely: Ensure the cupcakes are cool before crumbling; warm cakes can melt frosting.
- bold Color Caution: When using food coloring, start with small amounts to achieve desired shades without overpowering the batter.
- bold Layer Neatly: Pipe frosting carefully between layers to keep them visible from outside the jar.
- bold Experiment with Flavors: Don’t hesitate to mix different cake flavors and frostings for unique combinations.
- bold Keep It Refrigerated: Store your jars in the fridge until serving for optimal freshness.
Best Side Dishes for Easter Cake in a Jar
Pairing delicious side dishes with your Easter Cake in a Jar can elevate your celebration. Here are some great ideas.
- bold Deviled Eggs: A classic appetizer, these can be made with various fillings for added flavor.
- bold Spring Salad: Light and refreshing, toss mixed greens with seasonal veggies and a lemon vinaigrette.
- bold Honey Glazed Carrots: Sweet and savory, these roasted carrots complement the sweetness of the cake.
- bold Mini Quiches: Bite-sized quiches filled with vegetables or meats make for a perfect savory option.
- bold Fruit Platter: A colorful platter of seasonal fruits adds brightness and freshness to your table.
- bold Cheese Board: Include an assortment of cheeses, crackers, and nuts for guests who love savory snacks.
- bold Garlic Breadsticks: Soft and buttery breadsticks are always a hit during festive meals.
- bold Potato Salad: Creamy potato salad provides comfort food vibes that balance out the sweetness of dessert.
Common Mistakes to Avoid
Making Easter Cake in a Jar can be fun, but avoid these common mistakes to ensure your dessert turns out perfectly.
- Skipping the cooling step: Always let cupcakes cool completely before crumbling. If they are warm, the texture will be off.
- Overfilling the jars: Do not fill the jars too much. Leave some space for frosting and decorations on top.
- Not using food coloring evenly: Make sure to mix food coloring thoroughly in the batter. Uneven colors can lead to an unappealing look.
- Ignoring layer visibility: Ensure each layer of cake and frosting touches the jar’s edge. This helps create a beautiful layered effect.
- Forgetting to decorate: Don’t skip the topping! A little edible grass and jelly beans make your jars festive and visually appealing.
Storage & Reheating Instructions
Refrigerator Storage
- Store your Easter Cake in a Jar in an airtight container.
- It will last up to 5 days in the refrigerator.
Freezing Easter Cake in a Jar
- You can freeze these jars for up to 2 months.
- Ensure they are tightly sealed to prevent freezer burn.
Reheating Easter Cake in a Jar
- Oven: Preheat to 350°F and warm for about 10 minutes. Keep jars covered with foil.
- Microwave: Heat on low for 15-20 seconds. Check frequently to avoid overheating.
- Stovetop: Place jars in a pot of simmering water, heating gently until warm.
Frequently Asked Questions
Here are some common questions about making Easter Cake in a Jar.
Can I use different cake flavors?
Yes, you can substitute white cake mix with any flavor you prefer. Chocolate or lemon could be delightful options!
How do I make this gluten-free?
To make a gluten-free version, use a gluten-free cake mix and follow the same instructions.
Can I prepare it ahead of time?
Absolutely! These jars can be made a day or two in advance. Just store them properly in the fridge.
What other decorations can I use?
You can customize your jars with sprinkles, chocolate eggs, or even edible flowers for added flair.
Can I use larger jars for this recipe?
Yes, you can use larger jars, but adjust the layer sizes accordingly to maintain proportions.
Final Thoughts
This Easter Cake in a Jar is not only visually stunning but also easy to customize for any celebration. With colorful layers and delightful toppings, it’s sure to impress your guests. Feel free to experiment with different flavors and decorations to make it your own!
Did You Enjoy Making This Recipe? Please rate this recipe with ⭐⭐⭐⭐⭐ or leave a comment.
📖 Recipe Card
Print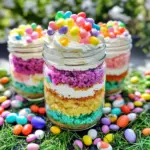
Easter Cake in a Jar
- Total Time: 50 minutes
- Yield: Serves 4
Description
Easter Cake in a Jar is a delightful and colorful twist on traditional desserts, perfect for spring celebrations. This layered treat combines fun flavors and vibrant colors, making it an eye-catching addition to Easter brunches, birthday parties, or any festive gathering. Each jar contains fluffy cake layers, creamy frosting, and whimsical decorations like edible grass and jelly beans. Not only are these jars visually appealing, but they also make serving easy and mess-free. Plus, kids can join in the fun by helping with the preparation!
Ingredients
- 1 White Cake Mix
- Food Coloring (pink, yellow, teal, purple)
- 1 Can White Frosting
- Edible Easter Grass
- Jelly Bean Easter Eggs
Instructions
- Prepare the batter as per package directions; divide into four bowls and tint each with food coloring.
- Fill cupcake tins with colored batter and bake according to package instructions. Let cool completely.
- Crumble cooled cupcakes into separate bowls to maintain color separation.
- Pipe frosting into a plastic bag; cut off one corner for easy layering.
- In jars, layer crumbled cake starting with purple, followed by frosting; repeat until jars are filled.
- Top with edible grass and jelly beans for decoration.
- Prep Time: 30 minutes
- Cook Time: 20 minutes
- Category: Dessert
- Method: Baking
- Cuisine: American
Nutrition
- Serving Size: 1 jar (140g)
- Calories: 380
- Sugar: 42g
- Sodium: 280mg
- Fat: 14g
- Saturated Fat: 4g
- Unsaturated Fat: 8g
- Trans Fat: 0g
- Carbohydrates: 63g
- Fiber: 1g
- Protein: 3g
- Cholesterol: 20mg